
Where we are, school starts next week! It seems crazy. I swear summer just started and it feels like school starts earlier and earlier. This week we did all of our back to school shopping, which is always such an exciting time for our kids. We decided to celebrate this exciting time with a back to school series of ice cream flavors. First up, pencil shavings!
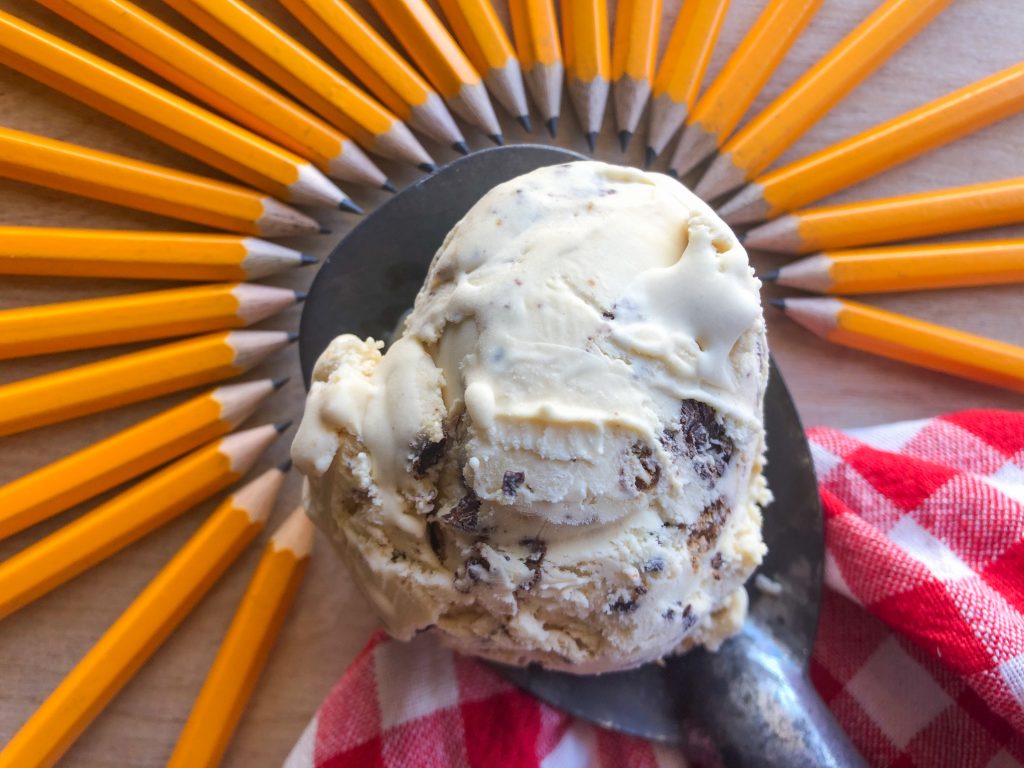
Don’t be alarmed. We didn’t use actual pencil shavings. That would be disgusting. We just wanted to invent a flavor that resembled it. Something with a roasted, crunchy, feel littered with dark flecks.
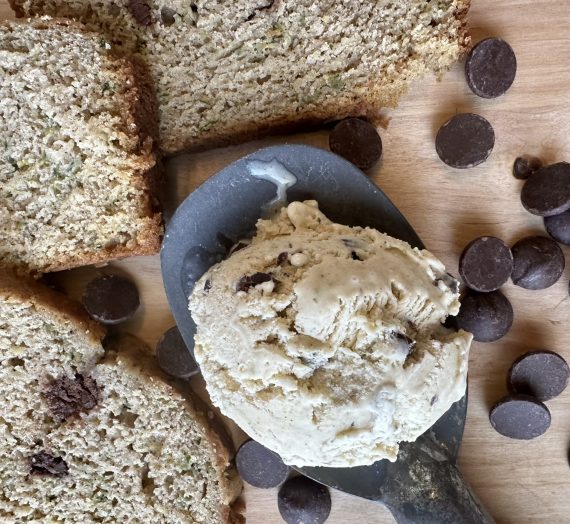
Of course, we knew how to make the “graphite” flecks. Just simple flecked chocolate. To get the woody part of pencil shavings, we toasted up some sliced almonds with brown sugar and cinnamon, adding the perfect crunch and tasty flavor. To top off the flavor, we added some cookie butter to the base and some yellow M&M’s, just to resemble the classic No. 2 pencil. This one was so fun to create and the taste and texture are just perfec!
Pencil Shavings
Definitely take note of this one!
Ingredients
4 egg yolks
1/4 cup powdered milk
3/4 cup sugar
2 cups heavy cream
1 cup whole milk
1/4 cup biscoff cookie butter
1 tsp vanilla
Dash of salt
- Candied Almonds
1 Tbs butter
1/2 cup sliced almonds
1/4 cup brown sugar
1 Tbs cinnamon
Splash of vanilla extract
- Chocolate Flecks and Mix Ins
4 oz bittersweet chocolate
Mini yellow M&Ms (see note)
Directions
- Mix together the egg yolks, powdered milk, sugar, cream, and milk together. Make sure to mix thoroughly! Don’t want any sugar or egg clumps left behind!
- Pour the mixture into a saucepan and heat over medium low heat until the base reaches a temperature of 162 degrees. Keep the base on a low heat and stir constantly, allowing the base to reduce for about 10 minutes.
- Remove from heat. Use the immersion blender to blend in the cookie butter and salt, until you get a nice, smooth consistency.
- Add base to a plastic gallon bag, and put in a prepared ice bath until cooled (about 15-20 minutes).
- Add the prepared base and vanilla extract to the ice cream maker. Make in your ice cream maker based on the maker’s instructions.
- During the last 5-10 minutes in the machine, when the ice cream is about the texture of soft serve, add in your prepared flecks (see instructions for adding that below) and then the mini M&Ms and almond pieces (broken up into small pieces). Don’t add it all in! Add handfuls at a time until you get your desired chunkiness.
- Move into the freezer until hardened (at least 4 hours).
- Candied Almonds
- Melt the butter in a pan over medium heat. Add the almonds, sugar, cinnamon, and vanilla.
- Cook, stirring continuously, for about 5 minutes, until the nuts are fragrant and coated with the sugar mixture.
- Pour the nuts in a thin layer over a piece of wax/parchment paper and allow them to cool. Cut into small pieces before adding it to the ice cream.
- Chocolate flecks
- Melt the chocolate in the microwave for 30 seconds at a time, stirring after each time, just until the chocolate is melted. Allow the chocolate to cool slightly.
- Right toward the end of your ice cream churning, slowly drizzle the chocolate over your ice cream. The chocolate will automatically harden and the ice cream maker will break up the chocolate pieces into smaller flecks. (We add the chocolate flecks before adding the other mix ins).
Notes
- We like to add mini M&Ms to our ice creams. We have found that full size M&Ms harden a lot and make it difficult to chew them, but the mini ones add the perfect crunch without tiring out your jaw.