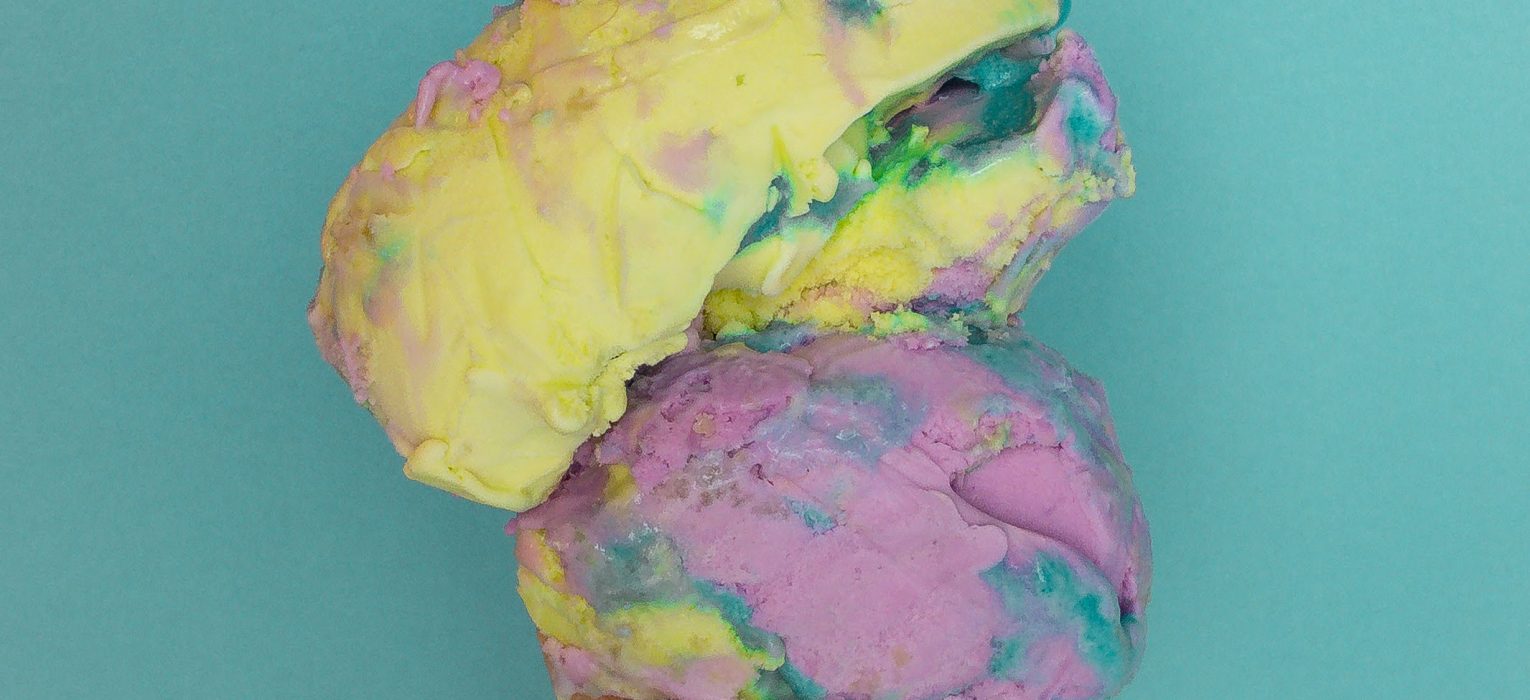
For Christmas we gave our kids a “party a month” kit. Every month we have a movie themed party complete with simple decorations, a movie based menu, and, of course, themed ice cream! Thus, our mermaid ice cream came to be!

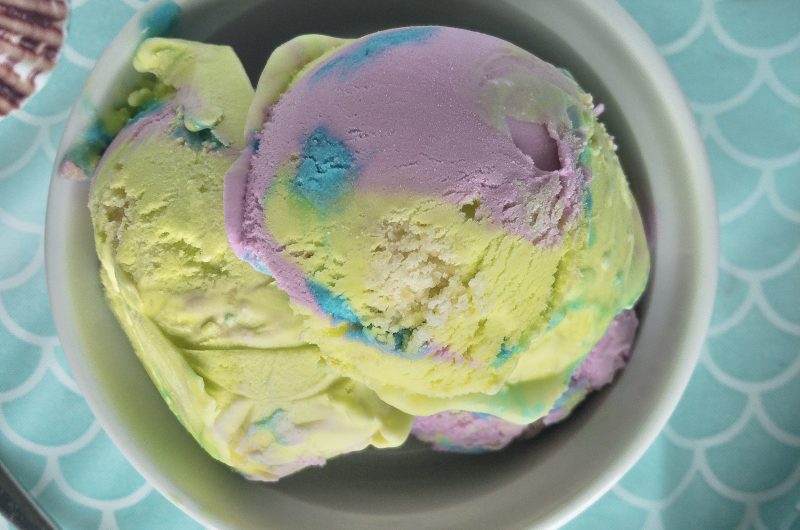
I’m sure there is a cooler looking ice cream somewhere, we just haven’t seen it. The flavor wasn’t anything to scoff at either! It was vanilla based with sugar cookie pieces and a blue buttercream frosting swirl. It is definitely a sweet flavor, but we are also definitely not complaining about that fact.
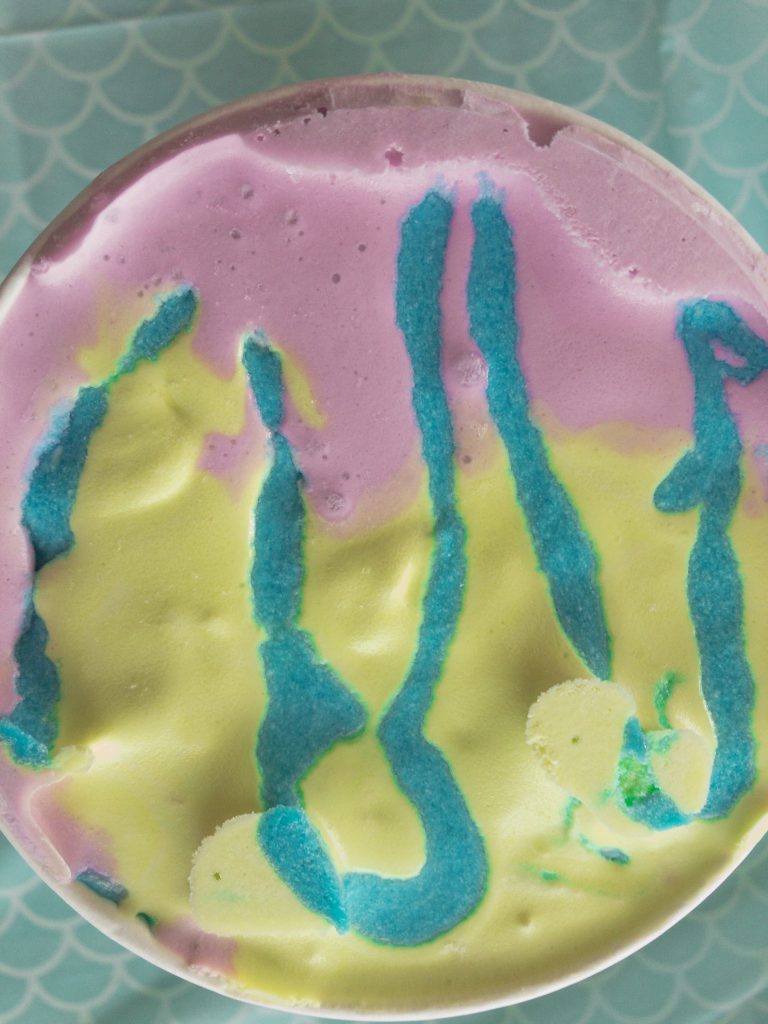
The colors were perfect! But, be prepared, you will have to use a decent amount of food coloring to get them so vibrant. Alternatively, you could use gel food coloring, which I’m sure would do a fabulous job, just make sure that they are completely dissolved in your ice cream. The bright colors made it the perfect addition to our mermaid party!
Mermaid
This should definitely be part of your world!
Ingredients
- Vanilla Sugar Cookie Ice Cream
1 cup heavy cream
1 cup whole milk
3/4 cup sugar
2 large eggs
1 Tbs vanilla extract
Dash of salt
Sugar cookies (cut into chunks)
Food coloring (We used neon green and purple)
- Buttercream Frosting
3 Tbs softened butter
1 1/4 cups powdered sugar
1-2 Tbs cream (or milk)
1/8 tsp vanilla extract
Dash of salt
Food coloring (We used neon blue)
Directions
- Heat the 1 cup heavy whipping cream and 1 cup milk on low in a medium saucepan until it reaches 140° F, stirring occasionally. While the custard heats, using an electric mixer to whisk the 2 large eggs in a medium mixing bowl until light and fluffy, about 2 minutes.
- While the cream is still heating, slowly add the 3/4 cup sugar into the eggs, whisking thoroughly to make sure the mixture doesn’t become grainy.
- After the cream reaches the target temperature, gradually pour it into the egg and sugar mixture, again whisking each time the cream is added to avoid cooking the eggs.
- Pour the entire mixture back into the medium saucepan and heat it to 170° F.
- Now pour the mixture back into the mixing bowl. Cover and chill for 1 hour or up to 3 hours. Do not add the food coloring yet!
- When ready, make in your ice cream maker based on the maker’s instructions. While it is running, make the frosting.
- Buttermilk Frosting
- Cream together the butter and sugar for a couple of minutes.
- Gradually add the milk about 1 Tbs at a time, just until you reach the consistency you want.
- Add the vanilla and salt. Start adding the food coloring a few drops at a time and let it incorporate. Continue adding until you have reached your desired color (We added quite a bit…)
- Pour the frosting into a plastic bag. When it is time to add it to the ice cream, simply snip a corner off of the bag and pipe in your layers as thick as you want.
- Finishing the Ice Cream
- When the ice cream is ready to come out of the ice cream maker, get two bowls ready, and pour half of the ice cream in each. Move one bowl to the freezer while you work with the other.
- Dye one bowl green, adding as much food coloring as you need in order to get your desired color. You have to move fast here though! Once you have reached the color you want, quickly fold in half of the sugar cookies. Move this bowl to the freezer.
- Get the second bowl out of the freezer and repeat step 2, this time with the purple food coloring. When you are done, you are ready for your ice cream container!
- Add a dollop of green and then a dollop of purple. DO NOT STIR! Once you have a nice layer on the bottom of your container, pipe a layer of blue frosting on top. Repeat, adding the purple and green ice creams in a kind of checkerboard fashion, until you have reached the top.
- Move the ice cream from the ice cream maker into a quart-sized container of your choice and freeze until hardened (at least 4 hours).